labellab.com

Call Now
Mon-Thu 8am - 7pm
Fri 8am - 6pm EST
Free Shipping
for orders of
$25.00 and more
Shopping Cart
 • $25.00 until free shipping.
Home  |  My Account  |  Custom Label Quoter  |  Metal Labels  |  Flexographic Labels  |  Custom Digital Labels  |  Weatherproof Labels

Ten Secrets to Effective Quality Control Labels

Tip #6Size Quality Control Labels to Fit.

« Prev. Tip  Next Tip »
But, make sure that they are big enough to read.
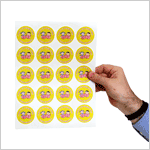
Find the calibration label design and label shape/size that best fits. The larger the label, the easier it is to write legibly. Unless required for the tiniest of instruments, the larger labels are generally the better choices. They are often no more expensive and will not only be easier to complete in the field - but will also be more legible.
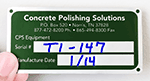
Calibration labels can be positioned almost everywhere. Yet, they need to be both out of harms way and easy to find. They should not be placed where someone is tempted to pick at the label or, benignly vandalize your label. A thin profile is best. Traditional spots are near the equipment nameplate or on the side of the instrument panel. Avoid placing the calibration labels in areas that attract frequent wear (e.g. a label position that is next to a handle or control pad).
Combo Calibration Labels Circular Calibration Labels Removeable Calibration Labels
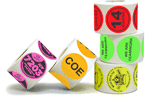
Combo Labels: Notify staff of two messages with one label. Save time and money. Two for the Price of One!. Circular calibration labels are increasingly popular. They get noticed faster and colored labels stand out from the background. 
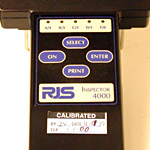
When placing a calibration label on the front of an instrument, note that you may be subjecting the label to increased wear and temptation for removal. Many companies prefer to situation their calibration labels on the side of the instrument.
Insider's Guide to Durable Calibration Label Positions

• Select a surface that is even, smooth and dry.

• Clean the application surface – ideally with our Surface Prep cleaner or some other alcohol or solvent-based cleaner.

• Before applying the label, your application surface should not be wet.

• Try to avoid getting your fingers on the surface adhesive when you take off the liner. We have found that a mere fingerprint decreases the adhesion of a calibration label by over 30%.

• Make sure to press down on the calibration label. This helps the adhesive to bind with the label application surface. Calibration labels adhere best when applied at a temperature of more than 40°F.

• Full adhesion takes time. The pull strength will build and reach it's full capability over 48 hours.

Jump to Tip #: 
« Prev. Tip  Next Tip »
Smartsign BBB Business Review
Order online 24 hours a day
using secure Google and
PayPal checkout. Pay by:
Pay by MasterCard, Visa, AmEx, Discover
Verified by PayPal
The safer, easier way to pay.
This site is tested daily and
certified Hacker-Safe site by:
McAfee Secure sites help keep you safe from identity theft, credit card fraud, spyware, spam, viruses and online scams